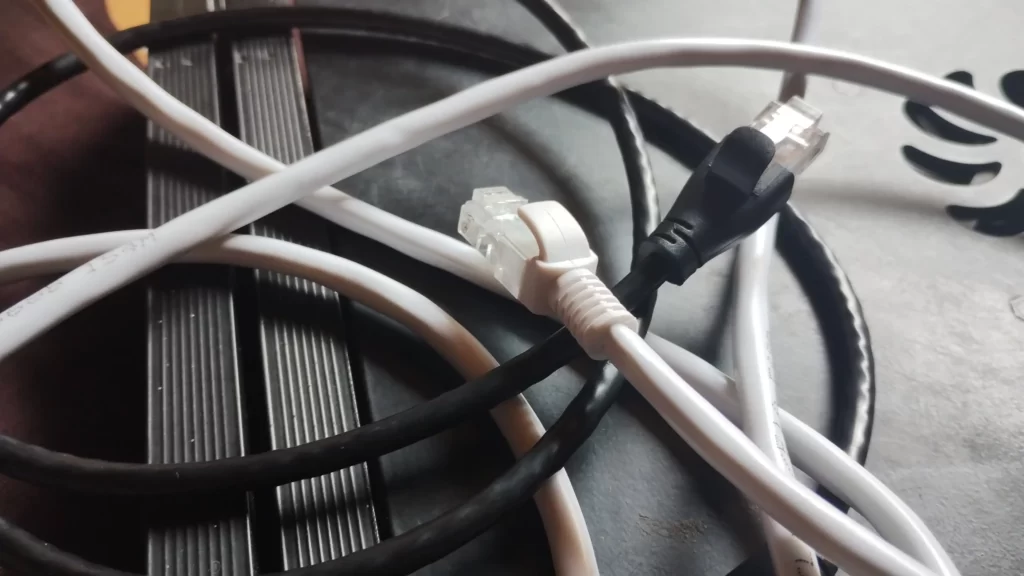
Even with the advancement in wireless technology, you may often require ethernet cables in certain situations.
For instance, if the ethernet connections were left out during your home construction, you might need to run the wires through the walls.
Furthermore, running an ethernet cable through your walls will be tricky if you do not follow the correct procedure. Fortunately, I will share detailed instructions to install ethernet cables through your wall.
To run ethernet cables through your walls, plan the routing of the wires, mark out the routing location, and get your tools together. Then, create a distribution point, turn off your home power source, and cut out holes in the wall.
Finally, label your cables where you want to place them and pass the ethernet cables through the wall.
How Hard Is It To Run Ethernet Cable via Walls?
The difficulty of running your Ethernet cable through the walls depends on your wall. For drywall, it is easy with the right tools and processes. However, a concrete/brick wall might be hard, unlike dry wooden walls.
If both sides of the wall are drywall, use a screwdriver to make a hole big enough to fit your Ethernet cable plug. Then, install the wire through the hole and arrange the plug around it.
The hole should be small and not noticeable. After assembling the plug, patch the area and repaint it.
Running your ethernet cables would not be as complex if you avoided the wall framing and the connections in the walls when drilling. A good drilling point is the wall area close to the ground.
Ensure you don’t drill into any plumbing. Once you notice an obstruction as you cut through the wall, move about six inches away from the area and continue drilling.
Also, you can run your ethernet cables through a brick or concrete wall. Then, you can run the cables inside the wall with a metal tube. Though it may be messy, it is possible.
Another way is to run the ethernet cable along the brick walls instead of running it through the wall.
Things to Have Before Running Ethernet Cable Through Walls
Before you run the cables through your walls, you should get the necessary equipment for the task.
The tools you need may vary depending on cost, wall type, and location. However, some tools are necessary. These tools are:
- Drywall Saw – This will be used to cut building features and materials during wiring works.
- Fish Tape – This instrument is used to pull electrical wires through conduits.
- Ethernet Switch – An Ethernet switch is for creating networks across a room. It has multiple ports, which use several ports for communication of devices within/ between the LAN.
- Label Marker – You’ll need a marker to make marks and point where to cut or pass a wire.
- Paddle Bit – These are used to drill diameter holes into woods. They use motion and their blade tips to make this effect.
- Stud Finder – This is used to find framing studs behind the final wall layer (particularly drywall).
- Patch Panel – Patch panel is used to organize cables in a safe form. It allows flexibility so the wires can be easily passed into the house.
- Drill – Drills are used to make fast holes or to drive fasteners into a hard body (wood or cement).
- Hand Saw – A hand saw is used to cut wood that will be used for fixtures.
- Ethernet Socket – Ethernet sockets are used to plug in Ethernet cables. It could be for normal wiring or WiFi.
- Crimping tool – This tool is used for conjoining two pieces of metal. This is done by deforming one and letting it hold onto the other. It can be used to affix a connector to a cable end.
- Ethernet Wall Socket – This device facilitates communication between devices in a shared network.
Step-by-Step Guide to Run Ethernet Cable Through Walls
Running your Ethernet cables through your walls is easy if you have the right tools. This is a step-by-step guide to running your cables through your walls.
#Create a Distribution Point
This is the first part of running your Ethernet wires through the wall. To create a distribution point:
- Turn off the home electricity to stay safe during the drilling and wiring.
- Ensure to make use of the correct studs for your cabling panel. Use your stud finder, sliding it along the walls to find the right studs.
- Drill holes in between the studs and cut out the intersecting holes. This is to check for obstructions behind the area of the wall you want to work with.
- If there are no obstructions behind the walls, proceed to saw off the drywall with the stud points till you get to the distribution point.
- Attach a wiring panel to the drywall to sort your cords.
#Drill Holes For the Ethernet Cable
After creating your distribution point, follow the instructions below to make holes for the cables:
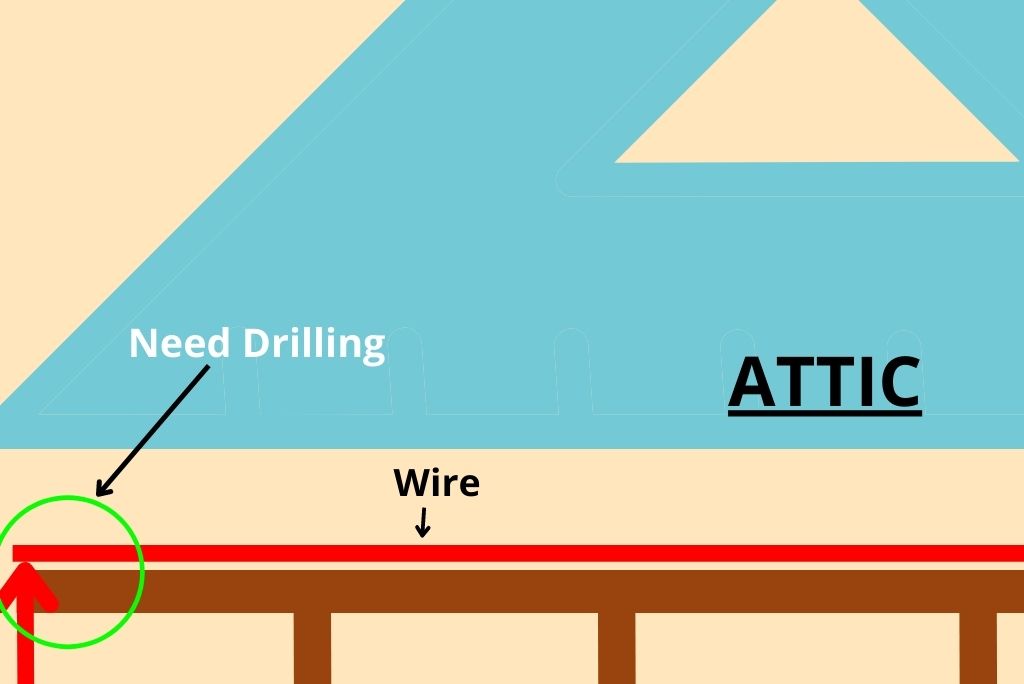
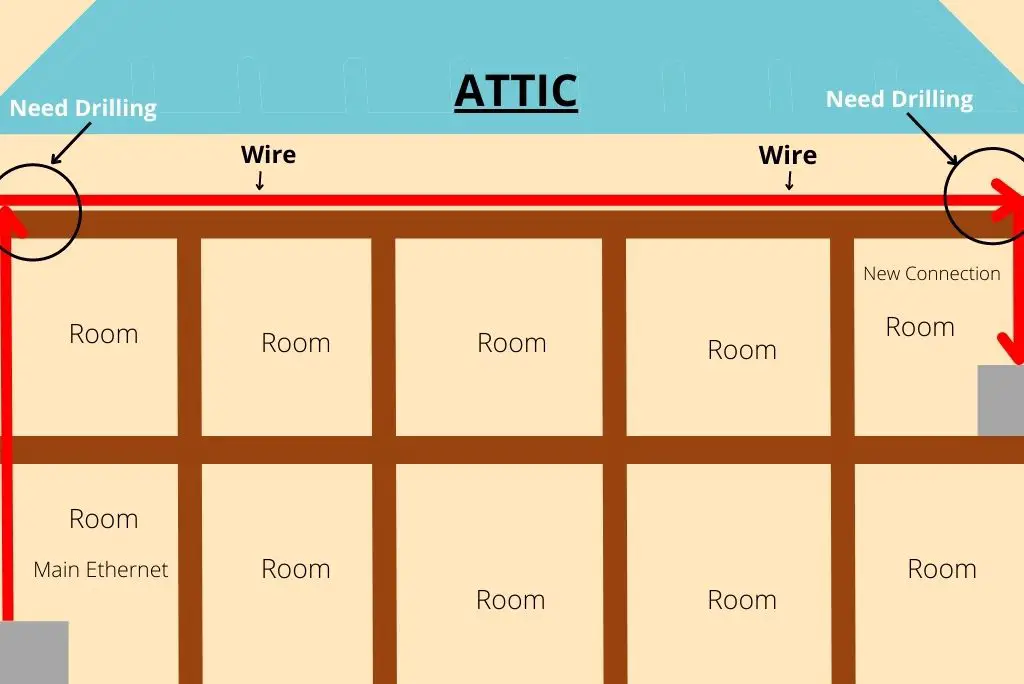
- Depending on your house, you may need to drill holes in your floor and your attic.
- Select a location above the distribution point and cut out the wood to create a connection from the distribution point.
- From your attic, drill holes in rooms that will need an ethernet connection. After cutting the holes, start running the cables through the walls.
#Label Your Ethernet Cables
If multiple rooms require an Ethernet connection, you must label the cables according to the rooms you will install them in.
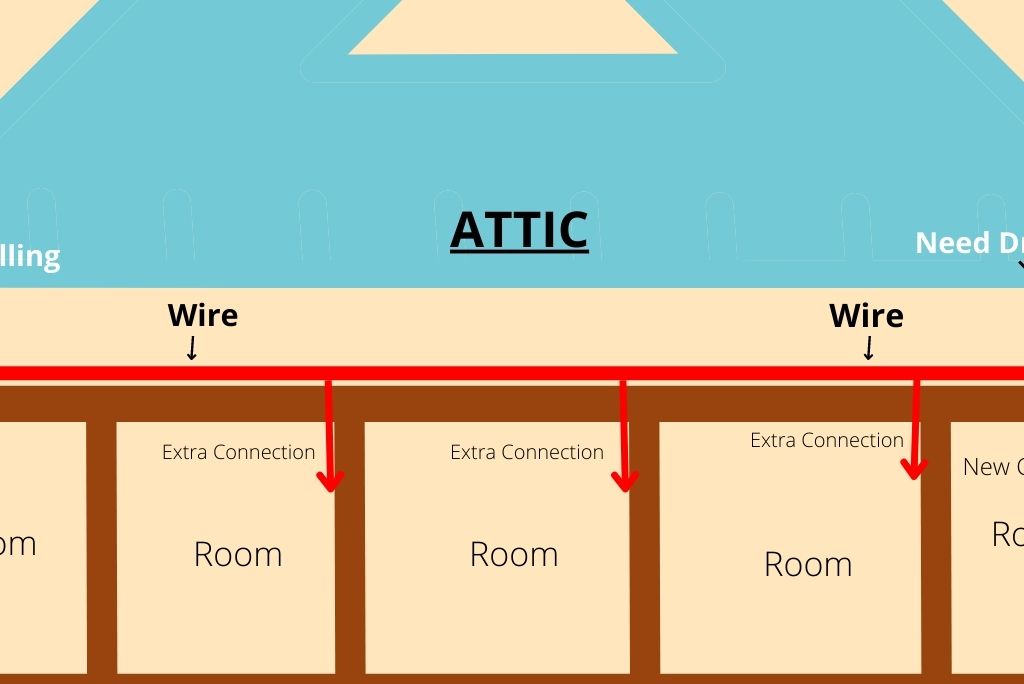
After marking them, pass them through the wall labeled for each room.
If you’re still feeling confused, you can watch this video for visual learning, as it might be easy for you.
Things to Consider While Running Ethernet Cable Through Walls
There are, instead, many things to consider when running ethernet cables. The house you live in, the environment, and the number of users. These are minor factors to consider. Some important things to consider are:
#Your Installation Environment
You should be able to answer questions like:
- What amount of cable will you need? – this entails creating floor plans. Next, you will need to measure the area you will cover. Finally, add five percent to your measurements. You can use a measuring tape or laser measuring tool to measure the area easily.
- Can you locate the electrical wiring? – Ensure to inquire from an expert if you are not sure where to locate your electric wiring before making any holes in the wall
- Does your location have a high Electromagnetic Interference(EMI)?– Ensure to prevent this by using unshielded cables. Motors, high-power electric panels, and other factors can affect your ethernet connection speed. Find out the type of cables that are more efficient for you.
#The Cable Types Required
Ethernet cables are of different types and speeds and are classified based on the amount of speed and data they can transmit.
For Ethernet cables, select the one that can provide a high-level speed and good-quality performance. You can also use a Flat Ethernet cable as it can fit anywhere. But they are not very durable, so I never recommend them for heavy usage.
You should avoid using Copper-clad aluminum as they are of inferior quality. In addition, aluminum tends to get too hot and produces low power. I would strongly recommend using copper cables.
- What type of cable is available and best for you?
- Can you afford the cost of the best cables?
- Is a cable jacket to be used?
- Good knowledge of the correct tools to be used
The tools you should have are:
- Crimp tool – To cut RJ45 plugs
- Scissors – I recommend the electrician’s scissors
- Flush cutters – required for in-depth cable preparation.
- Adjustable wire jacket stripper – to take out cable jackets accurately.
- Fish Tape
- Fish rod
#Purchasing Necessary Compatible Accessories
These accessories include:
- RJ45 plugs
- RJ45 Keystone Jack’s
- UV-rated outdoor zip ties
- Velcro straps
Tips to Successfully Run an Ethernet Cable In Your Wall
#Things You Should Do
- Arrange the power cable at a 90-degree angle to prevent interference.
- Use different colors of connecting cables to keep your cable arrangement organized.
- Mark the wires according to the location you want to place them and the termination process.
- Make use of an effective cable system.
- Purchase pre-connectorized wiring for easy installation.
#Things You Should Avoid
- Installing the wires in unsafe areas like over-conduit areas, water pipes, or beneath the floor.
- Tying cables or bundling them tightly could reduce the performance of the wires.
- Installing too many cables in a single location. It could overheat and reduce its quality.
- Exposing ethernet cables by termination. This could damage the wires in the end.
Installing Ethernet Cables Along Your Walls
Running ethernet cables along the wall is an alternative way to install your connection wires if running them in the wall is difficult for you.
Cable concealers help you hide the display of cables on your wall and keep the cables safe from damage.
Some concealers for running the cables along your walls are PVC and baseboard concealers.
You can also use concealer raceways. Nonetheless, there are some advantages of using installing your cables along the wall:
- First, it reduces the dead zone in your home connection.
- Second, you can hardwire high-bandwidth devices.
- Third, it is not invasive, as you will not have to disturb other home connections.
- Finally, you can remove it without complications.
Types of Cable Concealers
There are several cable concealers, such as PVC concealers, cable concealer raceways, and baseboard concealers. We’ll be talking about them shortly:
#PVC Concealers
PVC concealers are very efficient at managing Ethernet wirings. They are also available in different sizes and colors. In addition, these concealers are easy to customize.
Cable concealers are the easiest and most efficient way of managing ethernet cables. You could also paint it the color of your room with latex-based paint.
#Baseboard Concealers
This concealer naturally conceals your ethernet cables. They look like baseboard molding and have a corner easy-fix feature. With their D-shaped structure, they are easy to fit into wall corners.
You also do not need to use many nails to keep the concealer in place. Instead, you can paint it with latex-based paint to blend with the room’s aesthetics.
#Cable Concealer Raceway
You may need more than one concealer, depending on your home layout. For example, cable raceway concealers are ideal for corners of the walls.
However, if you need to run your cables vertically, you cannot use just the PVC concealer, as it will look out of place after installation.
Like the other concealers, you can cut and paint Cable concealer raceways to your needs. You can also install them with adhesives.
Conclusion
To run Ethernet cables through your walls, ensure to plan and mark your Ethernet cables. Cut out holes where you want to run the ethernet cables and pass them through the walls.
You can install Ethernet cables if you know the installation process, tools, and requirements.
Sources
https://en.m.wikipedia.org/wiki/Ethernet
https://lazyadmin.nl/home-network/home-ethernet-wiring/
https://www.wikihow.com/Install-Cabling-in-a-Pre-Built-Home